Friday, July 29, 2011

Jam Making Basics

A coworker of mine told me about a u-pick blueberry farm near by and I decided that I wanted to try to make blueberry jam with fresh picked blueberries. As luck would have it, the blueberry farm ran out of blueberries...
I called up my cousin Rachael, the food guru, to see if she wanted in on this first time jam making adventure. (she agreed, even though we shared a traumatic incident during our childhood in which Grandma Kregel had a beet explosion while canning that resulted in purple goo all over the ceiling and appliances) We scavenged for fruit at the farmers market and various grocery stores. We found a lot of good information at www.foodinjars.com/ and in the USDA Home Canning Guide

 The food processor made our lives a lot easier. We also found out that liquid pectin is the secret to making jam set. I have heard stories that powdered pectin makes your jam look more like syrup than jelly.  
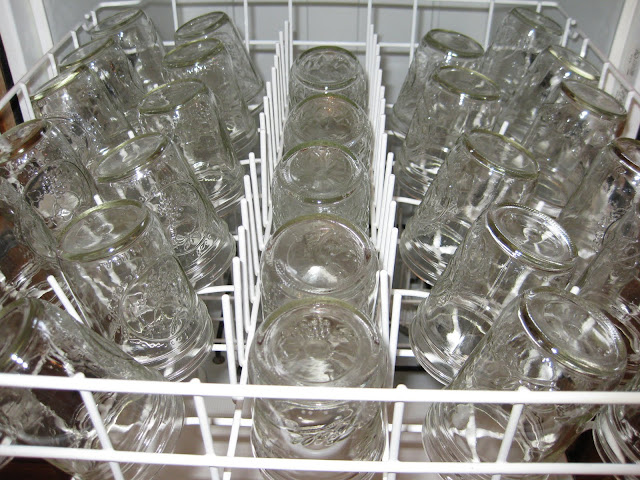
 Using the dishwasher to sanitize the jars and keep them warm was much easier than washing and boiling them. We ran one quick wash and then kept running the heated dry cycle.
Overall we used stuff I already had in the kitchen for the canning process; however, Rachael had a Ball utensil set that was very useful.

We ended up making a batch of blueberry jam, a batch of strawberry rhubarb jam, a batch of strawberry lemon marmalade and two batches of strawberry jam. We now have 38 half pint jars to give away! From our official taste testers, the strawberry lemon marmalade received the best reviews. We found this recipe in a Ball cook book.

Strawberry Lemon Marmalade 
1/4 cup thinly sliced lemon peel
4 cups crushed strawberries
1 Tbsp lemon juice
1 package of liquid pectin
6 cups sugar
7 (8 oz) half pint glass preserving jars with lids and bands
1. COMBINE lemon peel and water to cover in a small saucepan. Bring to a boil over medium-high heat and boil for 5 minutes, until peel is softened. Drain and discard liquid. Return peel to pan.
3.) ADD strawberries and lemon juice to peel and mix well. Gradually stir in pectin. Bring mixture to a full rolling boil that can not be stirred down, over high heat, stirring constantly.
4.) ADD entire measure of sugar, stirring to dissolve. Return mixture to a full rolling boil. Boil hard for 1 minute, stirring constantly. Remove from heat. Skim off foam.
5.) LADLE hot jam into hot jars leaving 1/4 inch headspace. Wipe rim. Center lid on jar. Apply band until fit is fingertip tight. (barely any resistance)
6.) PROCESS in a boiling water canner for 10 minutes (we used a large pot with a steamer basket on the bottom). Remove jars and cool. Let them sit for at least 12 hours and then check lids for seal. Lid should not flex up and down when center is pressed.

I made these labels with a graphic from graphicsfairy.blogspot.com/ and added text using http://www.picnik.com/

Our next foray into home canning will likely include pasta sauce and salsa!

Linked at: theshabbycreekcottage, shabbynest, fingerprintsonthefridge, romantichome, findingfabulousblog, houseofhepworths, graphicsfairy

Sunday, July 24, 2011

Summer Fun

(flowers from our yard)
Last night, after swinging by the county fair to eat our annual elephant ear, I had fun walking through our yard in the summer heat picking flowers. This year I decided to plant rose bushes for a variety of reasons. The house that I grew up in had several old rose bushes. I have many memories of bringing my elementary school teachers roses wrapped in foil. (yes, I was a suck up from a very early age)

(Denmark 2008)

 Ever since we visited our Danish exchange student's house, I have wanted climbing yellow roses like they have in their garden. Finally, this summer I decided to read The Secret Garden, which inspired my aunt to become a landscape architect when she was a little girl. This book made my desire for my very own roses even stronger.

(hopefully next year they will look a little more well groomed)

So far I planted two hybrid tea rose bushes on the east side of the house. (We Salute You and Grande Dame) Hybrid Teas are known to be good cutting flowers with large single blossoms on long stems. I also planted a yellow floribunda bush on the same side. (Honey Bouquet) Floribundas have 5-7 flowers in large clusters and they are more noticeable from a distance. On the south side of the house I planted a yellow climber called CI Smiley Face, so far he has not done much climbing.

Yesterday I purchased this red hybrid tea, In The Mood, to add to the fleet on the east side of the house. I intend to plant it today, if it's not a bajillion degrees outside.


(buffet in our breakfast room, makes me happy!)

Sunday, July 17, 2011

Love for My CSA

We decided to sign up for a CSA (community supported agriculture) program this year and I have been very happy with our decision. The weekly supply of produce has certainly upped our veggie intake. It has also forced me outside of my canned green bean comfort zone. The above photo includes all of the veggies from this week's basket. Check out our farm: pleasantacrefarm.com   If you are interested in finding your own CSA next year go to localharvest.org

I threw together a pasta salad using some of the above vegetables and my patio grown basil to go with our weekly steak/chicken combo. (This is a way to sneak more chicken into my diet since Mr. Moon looooves red meat)
Side note: my entire extended family has a soft spot for gnomes.

Ingredients: 2 cups cooked whole grain pasta, a hand full of shredded fresh basil, two medium tomatoes chopped, small chopped cucumber, Tbsp minced garlic, Tbsp olive oil, 1/2 c shredded mozzarella, kosher salt and ground pepper

Directions: Cook pasta according to package directions, add a dash of kosher salt to boiling pasta. Drain. Over low heat, add veggies, olive oil and garlic. Season to taste with salt and pepper. After a few minutes, once veggies are warm all the way through, remove from heat. Top each portion with mozzarella.

Tuesday, July 5, 2011

Patriotic Mini Cheesecakes

Our 4th of July was absolutely fantastic! Some of the highlights include attending the parade, patriotic temporary tattoos, fireworks, launching sky lanterns, great food, fishing and spending time with family. These mini cheesecakes were my contribution to the plethora of red, white and blue desserts we had at our cookout. (By the way, we inherited this lovely kilt-like wallpaper when we moved into our house and it is on our to do list to tear it down)

I came up with this recipe by using a couple of different suggestions I found online. The next time I make it, I will make my own pie filling. I could not believe a can of blueberry pie filling cost over three dollars! The flags were a free download from http://www.pickyourplum.com/ (I love this website, they email me every week day with great crafting bargains)

Ingredients: 2 (8oz) packages of softened cream cheese, 3/4 c sugar, 2 eggs, 1 tsp vanilla extract, 1/2 can of blueberry pie filling and 1/2 can of cherry pie filling, one batch of crust as listed below.

Directions:
  • Beat cream cheese, sugar, eggs, and vanilla until fluffy.
  • Line mini muffin pan with paper liners. Place 1/2 tsp of crust in each liner (enough to cover the bottom)
  • Fill each liner almost to the top with cream cheese mixture.
  • Bake for 15 minutes at 350 degrees. Cool on a rack for 10 min.
  • Top each cheese cake with pie filling.
Crust:
Mix 3/4 c crushed graham crackers (about six crushed crackers), 3 Tbsp of melted butter, and 1/8 c sugar.


The sky lanterns were a lot of fun. Thanks to my fairy godmother for coming up with the great idea and thanks to my mother-in-law for taking the photo.

Linked at: fingerprintsonthefridge, typeadecorating, blackberryvine,embellishinglifeeveryday, skiptomylou, blessedwithgrace, somedaycrafts, nightowlcrafting, thischickcooks